Chat with an Expert: Top Five Floor Refinishing Tips

Leon Fields knows floor refinishing can get tricky. As an industry expert with 25 years of experience, he has seen every kind of refinishing mistake and their corresponding ugly, unsafe, and costly results. As the in-house floor care expert for Kaivac, Fields generously shared his expertise on how to deliver safe, shiny floors that perform well and look great in our blog, The Ultimate Guide to Stripping and Refinishing Floors.
But no single blog can cover a quarter century’s worth of tips and tricks. Now, as he gets ready to retire, Fields finally reveals it all. Here are Leon Fields’ top five floor refinishing tips.
Floor Refinishing Tip #1: Know Your Floor
When it comes to floor refinishing, different materials demand different approaches.
“Vinyl Composite Tile (VCT) uses a traditional stripping product. But some of the new flooring options out there require product with a different pH,” Fields warns. “Get the pH wrong and you may damage the floor material so badly it will need replacing.”
To avoid that catastrophe, Fields strongly recommends knowing both the flooring type and manufacturer before even thinking about a refinishing job. Find out if you are dealing with a Luxury Vinyl Tile (LVT), marmoleum, linoleum, or a rubberized flooring product and follow the manufacturer’s recommendations for stripper, scrubbing pad, and process for best results.
Floor Refinishing Tip #2: Use a Hygrometer
Humidity plays a huge role in how fast—or slow—newly applied floor finish will dry. That’s why Fields urges investing in a hygrometer. This tool accurately measures the amount of water vapor in the air. Knowing both the actual outside humidity and the humidity of the room where floor refinishing is taking place helps determine the pace of the job.
“If the humidity is about 60 or 65%, the finish is going to take a long time to dry,” Fields explains. But don’t assume that low humidity is the way to go. “If the humidity drops below 30% the floor will dry very quickly. That means technicians must work extremely fast or break the job into smaller sections. Also, if the finish dries too quickly you might end up with drag marks left by the finishing head.”
Floor Refinishing Tip #3: Try the Sheet of Paper Test
Floor finish contains a mixture of solids and liquids. After application, the liquids evaporate leaving a thin layer of solids behind to cure and form the finish. The percentage of solids to liquids determine how many coats of finish are required to get to 100%. For instance, if the product is 25% solids it will take four coats to create the finish. However, those coats must be fully dry before the next application or the results will suffer.
“There can’t be any wet spots,” insists Fields. “Even 95% dry is not good enough.”
To test dryness Fields suggests starting with your nose. A lingering odor of finish probably means the floor is not entirely dry. If the technician remains doubtful, Fields advises trying the “sheet of paper test.”
The test is pretty simple:
- Grab a sheet of paper
- Place it on the floor
- Put your hand on the paper
- Try to twist the sheet
If the sheet of paper twists freely, the floor is dry and ready for another coat. If it sticks, the floor is still wet and needs more time. As simple as the sheet of paper test is, Fields does offer one caution.
“Don’t just test a single area and call it good. You must test multiple spots.”
Floor Refinishing Tip #4: Use Drying Fans Correctly
Using fans to help dry finish is a great idea…unless those fans are pointed in the wrong direction. Many technicians position the fans to blow air into the room. It feels intuitive, but here is why it’s wrong.
Remember that floor finish is made up of a percentage of solids and liquids. So, if the 25% of solids remain behind that means the 75% of liquids evaporate into the air. Positioning the fans so they blow away from the space helps draw those gasses out.
Also, blowing air into the room risks introducing dust and debris that could stick to the floor and mar the finish. Pointing the fans to the ceiling will disturb the dust that settled in high places. This dust will float down and stick to the finish, again leading to unsatisfactory results.
Floor Refinishing Tip #5: Patience is a Virtue
Every step of a floor refinishing job takes time so plan accordingly. Rushing leads to bad results, costly repairs, and unhappy customers. Or, as Fields bluntly puts it, “without patience, you’re going to screw up the job sooner or later.”
Being patient starts with applying the floor stripper. This chemical solution must dwell on the floor for between five to 15 minutes to work effectively. Make sure to follow manufacturer dwell time recommendations for best results.
And, of course, laying the floor finish requires patience as it dries. If technicians rush and try to apply the next coat too soon, the finish will not cure properly. This results in a dull, streaky, or cloudy surface that breaks down and requires refinishing sooner. It will also be hazardous as a shiny floor is more slip resistant and safer.
Bonus Tip: Use the Right Tool
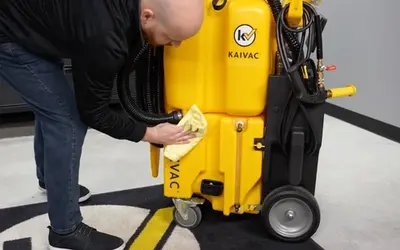
Depending on the material and amount of foot traffic, floor refinishing should take place once every three to five years. The process requires patience, but there are tools that streamline the job. Fields suggests first applying stripper with the Kaivac Trolley-Bucket and the Ergo Speed Spreader. After dwelling and agitating with a slow speed machine, use the AutoVac Stretch™ to pick up the slurry and then rinse the floor. Once the floor is dry, apply finish with the Trolly-Bucket and Ergo Speed Spreader fit with a microfiber pad.
These tools help take some of the hassle out of a time-consuming job. To explore more time-saving cleaning machines click here.
Related Posts
Preventive Maintenance for Your No-Touch Cleaning® System
Your Kaivac No-Touch Cleaning system makes restroom maintenance fast and easy. Keeping your No-Touch Cleaning system in good working order is also fast and easy. Kaivac makes performing preventative maintenance and troubleshooting potential issues simple. No special equipment or technical expertise required.
Read more
Are You Still Mopping?
The science has spoken. Mops don’t remove soil or pathogens from floors.But the old-fashioned tools are really, really good at spreading a contaminated slurry of dirty mop water around your facility.
Read more
Sustainable Grocery Cleaning Starts with the System—Not the Supply Closet
Grocery store managers are caught between two realities. On one side, their stores must be spotlessly clean and sanitary. Anything less will damage customer trust and affect sales.
Read more